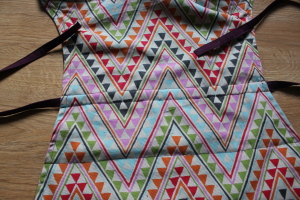
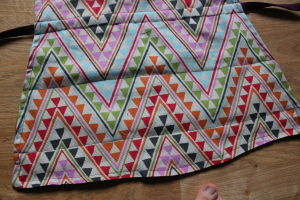
Categorie: Uncategorized

DIY: zelf een stevige draagzak maken

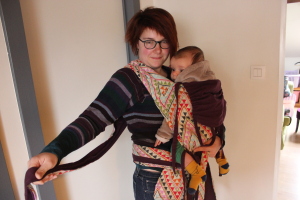
Sinds november 2015 ben ik naast foodie ook mama en dus worden de culinaire activiteiten eventjes ingewisseld voor de wondere wereld der baby-spulletjes. Van mijn schoonzus kon ik een tricot-slen draagdoek lenen en na het overwinnen van enige terughoudendheid (dat gaat nooit lukken/wat een gedoe met die lange flappen/is dat niet voor hippies…) en het wat beter leren knopen (zodat het niet voelde alsof ik plotseling weer 41 weken zwanger was) zat ons kleintje daar lekker knus tegen mij (of papa) aan. En wat heerlijk om de handen af en toe vrij te hebben terwijl de baby toch getroost wordt door mama’s warmte. Om nog maar te zwijgen van het gemak op het Brusselse openbaar vervoer: gedaan met speuren naar liften of lief kijken naar anderen om de maxi cosi een trap te helpen opsjouwen… Helemaal enthousiast geworden door deze nieuwe perspectieven die zich voor ons openden en met een trip naar Parijs in het vooruitzicht (waar de metro’s naar het schijnt een hel zijn voor de doorsnee buggy) schreven we ons in voor een workshop dragen bij Myriam van Dragen in Brussel en maakten we kennis met de verschillende dragers. Naast onze rekbare draagdoek, waar ons hummeltje stilaan is uitgegroeid, zijn er namelijk ook geweven draagdoeken, ring slings, mei tais, …

Na de draagworkshop ging ik in webshops op zoek naar een model dat me aanstond, maar de prijzen van de meeste draagzakken maakten even de Dagobert Duck in mij wakker. Mooi, maar niet goedkoop. En na wat surfen en rondsnuffelen op blogs van handige mama’s begon deze doe-het-zelfster weer goesting te krijgen om acher de naaimachine te kruipen.

Dus terwijl ik een uitstap naar de stoffenwinkel plande tijdens de laatste dagen van de solden én van m’n bevallingsverlof stak de projectkoorts op. Jeweetwel, dat gevoel van uitdaging en een hoofd vol plannen en ideeën wanneer je aan iets begint dat je eigenlijk doodgraag doet – in mijn geval achter de naaimachine kruipen. Ik deed veel inspiratie op door de blogs van Grumbles And Grunts en Barefoot And Pregnant Esquire. Ik besloot een mei tai te maken naar het model van de Girasol MySol, dat ik ook had uitgetest in de draagcursus. Het voordeel van de MySol is dat er geen gespen of andere plastic/metalen onderdelen aan te pas komen, alles werkt met touwtjes en linten. Bovendien kun je hem groter en kleiner maken, zodat hij geschikt is voor hele kleine baby’s tot en met hele grote. Ik vond de afmetingen van de MySol hier.

Mijn draagzak heeft 2 meter lange schouderlinten en 3 meter lange heuplinten. Daarmee maken zowel mijn man als ik (beide doorsnee grootte) vlotjes een knoop vooraan met het heuplint en een knoop achteraan met de schouderlinten. Je kan dus iets korter gaan (zeker voor de heupen), zorg dan wel dat je eerst de nodige afstand meet op jezelf met een lintmeter en rekening houdt met de knopen die je nog moet leggen. Veiligheid is belangrijk dus maak geen te korte linten (je moet een dubbele knoop kunnen leggen) en kies zeker een stevige stof en kwaliteitsvolle draad!

Deze draagzak is helemaal uit stof gemaakt in twee kleuren, zodat je hem langs twee kanten kan gebruiken (handig voor als hij bij je hele kleerkast moet passen, of als je partner doorgaans een meer/minder flashy kleurenpalet hanteert). Je kan hem uiteraard ook uit één kleur te maken, dit bespaart je mogelijk een beetje stof. Ook dan kan je hem nog langs twee kanten gebruiken.

De benodigdheden kostten mij alles tesamen zo’n 60 euro (stof + vulling + draad), maar als je op zoek gaat naar goedkope stofjes of kan werken met resten kan het uiteraard nog een pak goedkoper. Onderaan de pagina vind je enkele tips om goed aan de slag te gaan met de drager, maar ik kan je van harte aanbevelen om een workshop dragen te volgen, dat kan bijvoorbeeld bij Myriam.

Veel succes ermee en laat mij zeker iets weten als je het zelf uitprobeert! Schattige foto’s van kleintjes in draagzakken please!

Wat heb je nodig:

Textiel: ik gebruikte stevige, canvasachtige interieurstoffen van 100% katoen (gevonden in Maison Dorée, de keten van de Nekkertex). Ik koos voor niet té dikke, ademende stoffen zodat ik in de zomer niet loop te puffen (een baby geeft al genoeg warmte af – letterlijk en figuurlijk :-)). Gordijn- of meubelstof, denim, een stevige tafeldoek, de meeste stoffen van IKEA… als het maar stevig aanvoelt (als in, je durft je meest precious bezit erin ophangen) en ademt. Ik heb geen ervaring met rekbare stoffen voor zo’n draagzak, dus ik zou het niet aanraden – alleszins op eigen risico uit te proberen.

De (gordijn)stof die ik kocht was 280 cm breed en ik kwam ruim toe met 1,5 meter van elke kleur – ik kon er zelfs twee zakken van maken. Belangrijk is wel om te weten dat ik de linten heb geknipt in de draadrichting (en dat ook zou aanraden voor de stevigheid), waarbij ik alle linten uit twee delen heb gemaakt (1,5m + 0,5m voor de schouderlinten en 1,5m + 1,5m voor de heupen). Als je stof 280 cm breed is kom je ook toe met 1 meter van elke kleur, maar dan moet je drie panelen aan mekaar zetten voor het heuplint.

Als je stof koopt van 140 cm breed (zoals de meeste stoffen) heb je 1,5 meter van beide kleuren nodig.

Als je de hele doek uit één kleur maakt volstaat 1,5 meter van 280 cm breed of 3 meter van 140 cm breed.

Let op: je hebt iets meer stof nodig als je kiest voor stof met een patroon, als je het patroon mooi wilt laten aansluiten. Hoeveel meer hangt af van de herhalingsafstand van het patroon.

Draad: 2 rolletjes Gutermann draad in de kleur van één van de stoffen. Ik kocht 1 rolletje en viel zonder draad toen mijn zak bijna af was en de Veritas al gesloten – bestaat er iets meer frustrerend? (gelukkig zat er nog een zetelproject – ahem – in mijn ooit-eens-aan-beginnen-schuif in een gelijkaardige kleur waarvoor ik al draad had gekocht, zodat ik toch nog lekker veel te laat kon doorwerken).

Vulling: vraag in de stoffenwinkel naar dikke fluffy vulling (er bestaat vast een professionele naam voor, maar die ontglipt me even) voor je schouder- en heuplinten. Ik koos de dikste van de drie opties en kocht 0,5 meter van 1,4 meter breed. Daarmee kan ik waarschijnlijk een zak of 5 maken… Met 0,3 meter kom je m.a.w. ook toe (maar zoiets is altijd handig om in stock te hebben, toch?)

Materiaal:

need to have: een naaimachine (ik raad af om dit met de hand te proberen, tenzij je naam Assepoester is), jeansnaalden (ik heb er twee gebroken op het einde bij de laatste vijf stiksels), een goede stofschaar, patroonpapier (papier met ruitjes is o zo handig), een gewone naald, een lintmeter, spelden, een strijkijzer

nice to have: kleermakerskrijt om te traceren op de stof, enige naai-ervaring komt ook van pas.

Oké, let’s get started!

Vooraleer je uit de startblokken schiet, kan je best de stof wassen zodat ze achteraf niet krimpt, goed soepel wordt en de meeste chemicaliën van de productie eruit zijn (als jouw kind is zoals het mijne durft hij al wel eens sabbelen op die doek). Wassen op 30 graden is voldoende, maar zorg ervoor dat je de stof niet opgevouwen in de machine steekt, want dan kan je witte strepen krijgen waar de vouw zit. Strijk de stof daarna, zodat de ergste kreukels eruit zijn en ze goed plat ligt voor het knippen.

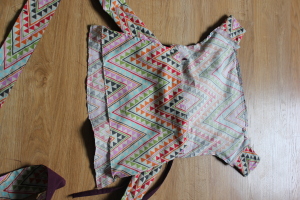
Begin met het uittekenen en knippen van de patronen en ze uit te leggen op de stof. Teken de patronen over van de modellen op de tekening. Alle afmetingen zijn in centimer (klik om groter te maken).
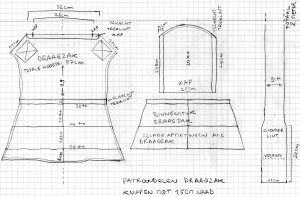
patroondelen draagzak

Je hebt de volgende stukken nodig:

(NB: als je alles uit één kleur maakt knip je gewoon alles behalve de treklinten dubbel)

– (1) draagzak: 1 van elke kleur (knip 1,5 cm naad extra)
– (2) kap: 1 van elke kleur (knip 1,5 cm naad extra)
– (3) binnenstuk draagzak: 1 van elke kleur (knip 1,5 cm naad extra)
– (4) schouderlinten: in totaal 2 x 2 meter van elke kleur, geknipt met de draadrichting mee. Knip 2 stroken van 13 cm breed (naad van 1,5 cm inclusief) en 1 strook van 12 cm als je 1,5 meter lange stof hebt.
– (5) heuplint: in totaal 3 meter van elke kleur, geknipt met de draadrichting mee. Knip stroken van 12 cm breed (naad van 1,5 cm inclusief)
– (6) treklinten: stroken van 5 cm breed: 1x 150 cm, 1x 100 cm en 2x 75 cm (in totaal 4 meter) uit één van de twee kleuren (!).
– (7) lussen voor de schouderlinten: in totaal 65 cm van elke kleur, stroken van 10 cm breed
– (8) vulling: 80 x 9 cm voor het heuplint en 2 maal 60 x 11 cm voor de schouderlinten. Knip de schouderlinten smaller vanaf 11 cm lengte om overeen te komen met de versmalling van de stof (zie foto).

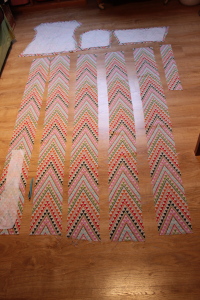
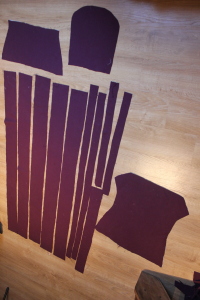
Hieronder een voorbeeld van hoe je dit kan uitknippen. Je kan natuurlijk ook de stof en de patroondelen dubbelvouwen.
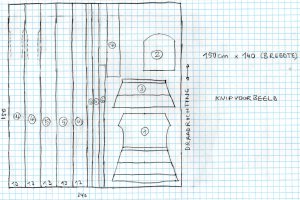
knipvoorbeeld bij stof van 140 cm breed

Bij het knippen van de patroondelen is het handig om de eerste uitgeknipte kleur op de tweede te leggen (zelfde stofkanten op elkaar), zo komen je naden later netjes overeen.


Wanneer je alle patroondelen hebt uitgeknipt, markeer je de naden en details met kleermakerskrijt.

Opmerking vooraf: de naden mag je altijd tesamen afwerken tegen het rafelen, tenzij er staat ‘strijk de naden open’. De zigzag functie van mijn naaimachine werkt niet goed dus de mijne zijn met rechte steken afgewerkt, maar een zigzag of interlock als je dat hebt is handiger tegen het rafelen.

We beginnen met de linten.

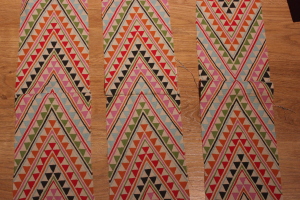
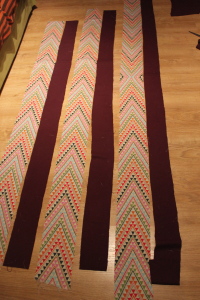
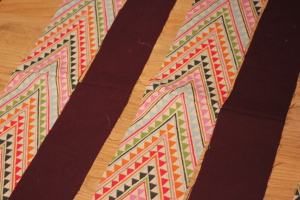
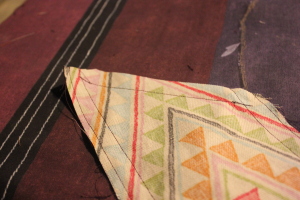
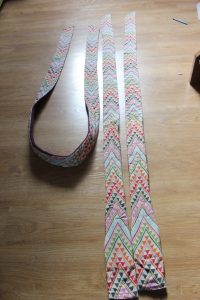
Heuplint: als je stof minder lang is dan 3 meter, stik dan eerst de korte kanten aan mekaar. Strijk de naden open en werk af. Doe dit voor beide kleuren. Leg dan de goede kanten van de stof op elkaar en stik de naden door tot 9 cm breedte. Stik één van de korte kanten schuin af voor het uiteinde van je lint, knip de overtollige stof weg en werk alle naden af tegen rafelen.

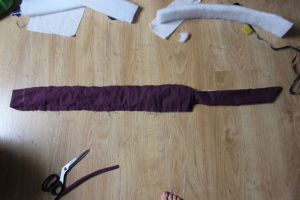
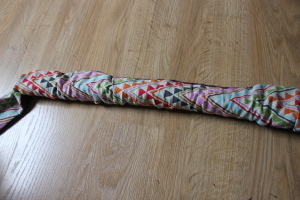
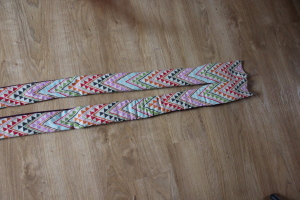
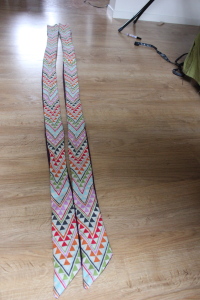
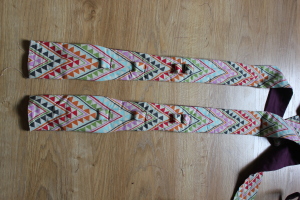
Schouderlinten: zet de stof met de korte kanten aan elkaar zodat je twee linten van minstens 2 meter hebt. Strijk de naden open en werk af. Doe dit voor beide kleuren. Leg dan de goede kanten van de stof op elkaar en stik de linten door tot 11 cm breedte op de eerste 22 cm, om dan te versmallen naar 9 cm breedte voor de rest van het lint. Het stuk van 11 cm breedte vormt de aansluiting aan de draagzak en wordt voor de eerste 11 cm weggewerkt in de zak, voor de stevigheid. Mijn schouderlinten waren 150 cm + 50 cm in de lengte en ik maakte het stuk van 11 cm breedte aan het begin van de langste strook van 150 cm, zodat de naad quasi altijd onzichtbaar is wanneer je de draagzak hebt geknoopt.
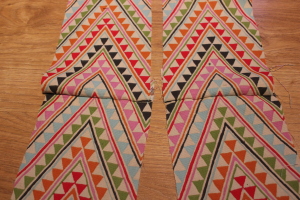
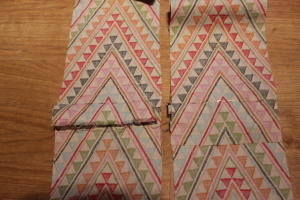
schouderlinten aan mekaar gezet
linten aan mekaar gezet
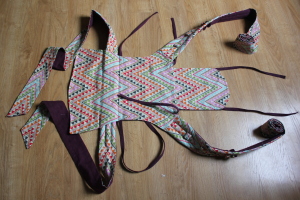
de linten
schouderlinten
verbreding aan uiteinde van het schouderlint
uiteinde van de linten

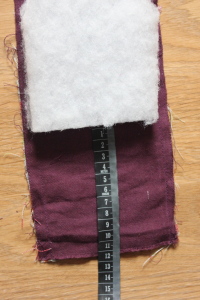
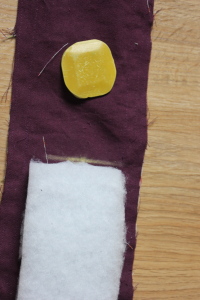
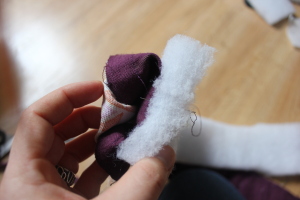
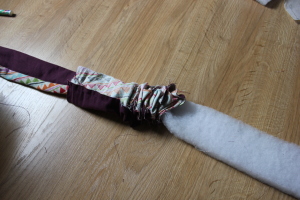
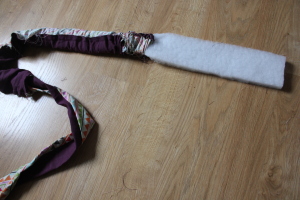
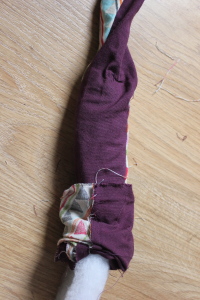
Leg de vulling op de linten en duid met kleermakerskrijt aan tot hoe ver die moet komen. Laat voor de schouderlinten 11 cm van de brede strook vrij van vulling, dit stuk komt in je draagzak. Voor het heuplint betekent dit dat je het midden van de vulling gelijk legt met het midden van je lint en langs beide kanten aftekent. Draai de linten binnenste buiten (de goede kant naar buiten) en strijk ze goed plat langs de naden. Nu volgt een prulwerkje: de vulling erin steken. Begin met de schouderlinten. Rol het lint terug binnenste buiten op totdat je aan de streep bent gekomen. Zet op dit punt de vulling vast aan de stof met naald en draad en enkele steken en een stevige knoop. Rol dan de stof terug over de vulling totdat de vulling er helemaal in zit. Frutsel ermee totdat de vulling netjes plat in het lint zit (je moet de vulling eigenlijk een beetje ‘masseren’). Knip de steekjes die je maakte weer door. Doe hetzelfde met het heuplint. ‘Masseer’ totdat de vulling mooi in het midden zit. Dit is nog een groter foefelwerkje omdat de vulling hier in het midden van het lint moet komen maar houd moed, je zal een heerlijk zachte draagzak hebben. Strijk daarna de linten netjes plat, ook over de vulling.
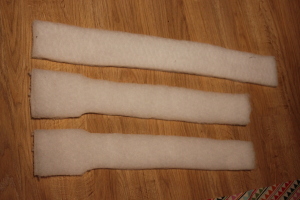
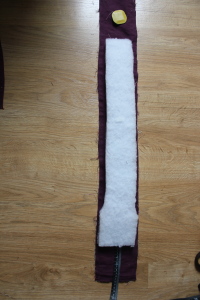
voering uitgeknipt
leg de voering op de omgekeerde linten
leg de voering op de omgekeerde linten op 11 cm hoogte van de schouderlinten
markeer het einde van de voering op de stof
rol het lint weer naar de goede kant
maak de voering vast aan het lint met enkele stevige steekjes
Trek het lint weer naar de goede kant over de voering
Trek het lint helemaal over de voering
Trek het lint weer naar de goede kant over de voering
Trek het lint helemaal over de voering
Duw de voering in de stof totdat alles goed plat ligt
Strijk de linten mooi plat

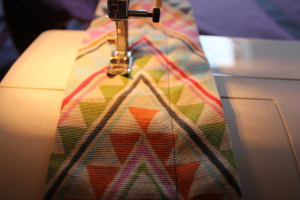
Maak de andere kant van het heuplint af door schuin af te knippen, enkele steekjes van de naad los te tornen, de naden naar binnen te draaien, strijken en zo vast te naaien. Stik de linten door op 3 en 6 cm breedte, bij de dikkere gedeeltes moet je de stof soms wat door de naaimachine ‘helpen’. Stik de uiteindes nog eens door. Je linten zijn klaar!

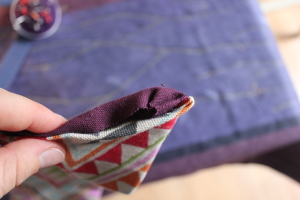
de linten platgestreken
Knip het uiteinde schuin af en draai de uiteindes van het lint naar binnen
Stik de linten door op 3 en 6 cm breedte
De linten zijn klaar!

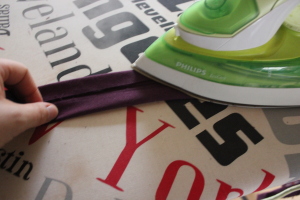
Treklinten: Deze maak je van de stroken van 5 cm breed. Begin met de linten dubbel te vouwen en dit goed te strijken. Plooi vervolgens de uiteindes naar binnen, zodat je een mooi lint van ongeveer 1,5 cm breed krijgt. Speld vast indien nodig, strijk opnieuw en stik aan weerskanten helemaal door. Stik heen en weer op het uiteinde om rafelen te voorkomen. Je treklinten zijn klaar!
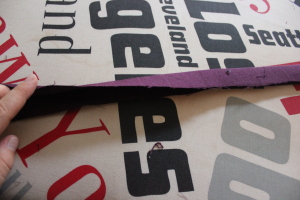
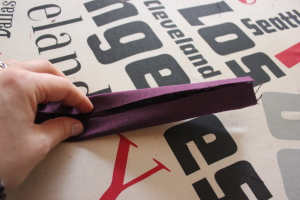
Strijk het lint in de helft
Vouw de lange zijdes dan opnieuw dubbel
Strijk opnieuw plat
Vouw de linten dicht zodat ze 1,5 cm breed zijn
Stik door aan de open kant
Stik door aan de andere kant

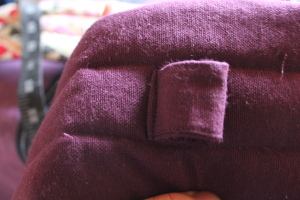
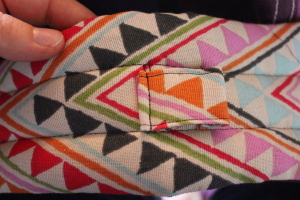
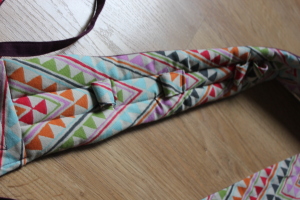
Lussen voor de schouderlinten: Maak deze lussen zoals de treklinten, van de stroken van 10 cm breed zodat je eindigt met linten van ongeveer 3 cm breed. Je gaat deze lussen bevestigen op 10, 20 en 30 cm hoogte van de schouderlinten, aan twee kanten tegelijk. Meet 10 cm vanaf het begin van de vulling in de schouderlinten (!! de eerste 11 cm komen straks in de draagzak te zitten ter versteviging). Speld het lussenlint op deze hoogte vast in het midden van het schouderlint, met de lange kant naar het begin van het schouderlint gericht. Speld het lussenlint van de andere kleur vast op dezelfde plaats en controleer of ze overeen komen. Naai dan het lint vast. Opgepast, bij dit stuk zijn mijn jeansnaalden gebroken. Ik laat de machine gewoon een lengte vooruit en dan weer achteruit naaien, niet te snel. Als dit vast zit, meet je 7 cm vanaf het stiksel en knip je de lussenlinten daar af. Plooi één van de twee lussen (best de kleur die je hebt gekozen voor je draad) om en vouw het uiteinde eronder, speld vast zodat je een lus krijgt, zorg dat het stuk aan de andere kant niet in de weg zit en naai vast. Draai nu het schouderlint om en zet de tweede kleur vast op hetzelfde stiklijntje. (Als je probeert om beide kanten tegelijk te doen komt het bijna nooit netjes uit, omdat je zo’n dik pak onder je naaivoet moet schuiven). Herhaal dit op 20 cm en op 30 cm van het uiteinde van het schouderlint, maar maak van de lus bij 30 cm een dubbele: in plaats van af te knippen op 7 cm naai je de lus eerst één keer vast, maak je een nieuwe lus van 7 cm en doe je dan de eindhandeling. Herhaal voor het tweede schouderlint.
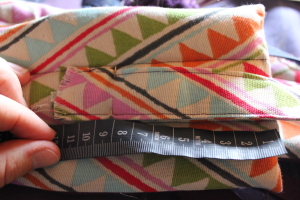
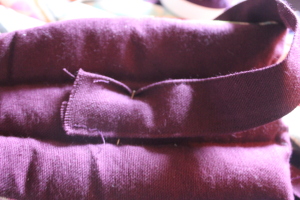
Speld het lint vast op 10 cm van het uiteinde van het schouderlint
Speld ook de andere kant vast
Naai vast
Knip af op 7 cm
Plooi één kant naar binnen en naai vast
Naai ook de andere kant vast op de lijn van het stiksel
Voor de dubbele lus naai je eerst halverwege vast en knip je dan 7 cm af
De lussen zijn af!

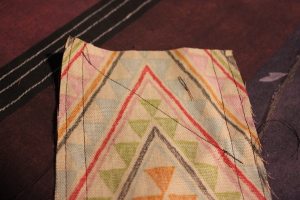
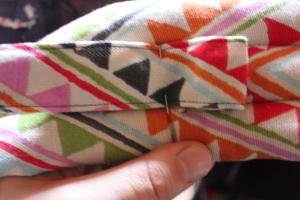
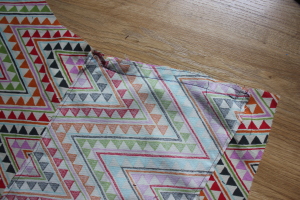
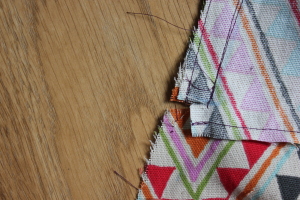
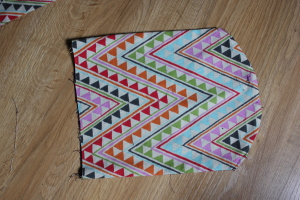
De kap van de draagzak: De kap heeft aan weerskanten een schacht voor de treklinten, die je kan gebruiken om de kap als neksteun te laten dienen of om de kap omhoog te houden. De schachten zijn 2 cm breed en de stof moet bovenaan omgenaaid worden over die breedte. Begin met een knip aan weerskanten in de naad (zie foto). Sla de stof om, knip af tot 1 cm en zigzag tegen het rafelen. Stik ze netjes vast op 0,5 cm. Als je dit voor de beide panelen van de kap hebt gedaan leg je de goede kanten op elkaar en stik je op de naden, behalve de onderkant en de openingen van de schachten die je net hebt gemaakt. Knip het ronde deel enkele keren in. Keer de kap binnenstebuiten en strijk plat. Naai de schachten van het treklint op 2 cm breedte van de rand en werk af met het doorstikken van de afgeronde bovenkant van de kap op 0,5 cm. Trek er de twee treklinten van 75 cm door met behulp van een veiligheidsspeld. De kap is klaar!
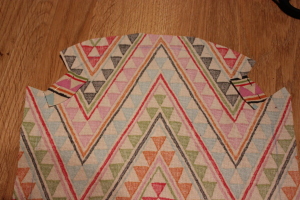
Knip de naad van de kap in waar de trekschachten komen
Naai de kap vast aan 3 kanten, knip de naden in en draai om
Naai de schachten op 2 cm van de zijdes
Trek de linten door de schacht met een veiligheidsspeld en je bent klaar!

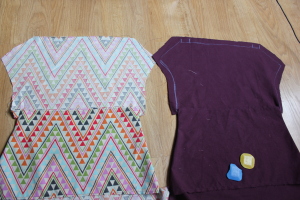
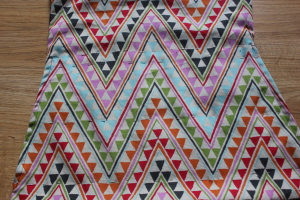
Draagzak: Start met het binnenstuk van de draagzak. Dit dient om extra versteviging te creëren voor het heuplint en treklint dat hier later door gaat. Werk de zoom van de horizontale kanten van het binnenstuk af tegen rafelen.  Leg het binnenstuk op het draagzak paneel met de goede kanten op elkaar en stik de zijnaden tot aan de hoeken van het patroon (dus niet helemaal doorstikken naar onder en boven). Knip in waar je naad stopt. Werk de naden af tegen rafelen. Draai binnenstebuiten en strijk de zijnaden plat. Stik door op 0,5 cm afstand van de rand. Doe dit voor beide delen.
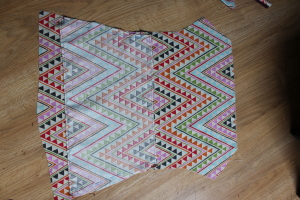
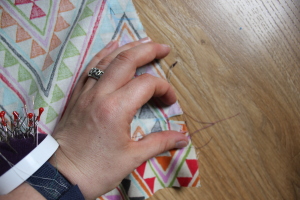
Naai het gezoomde binnenstuk op het paneel van de draagzak
Knip in ter hoogte van het einde van de naad
De panelen zijn klaar met binnenstuk, keer ze weer naar de goede kant

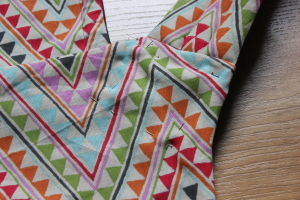
Maak ook de uiteindes van de schacht voor het treklint onder de kap. Knip de naden in ter hoogte van het stukje tussen de kap en de schouderlinten (zelfde als bij de kap). Knip de naden tot op 1 cm, werk de uiteindes af tegen rafelen, plooi om en stik door op 0,5 cm van de rand. Knip de overtollige stof weg.
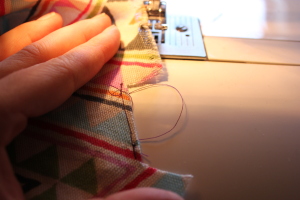
Naai de uiteindes voor de schacht op het paneel van de draagzak

Nu komt de grote finale: de assemblage van alle onderdelen!

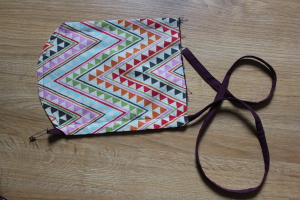
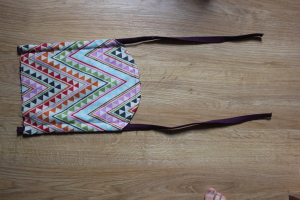
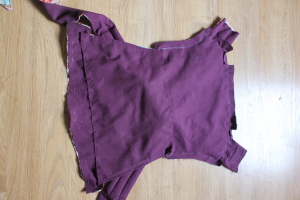
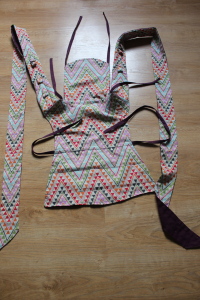
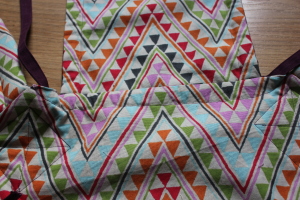
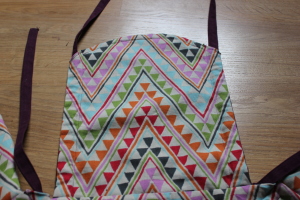
Leg één van de twee draagzak panelen met de goede kant naar boven. Leg de kap hierop, bovenaan in het midden  met de zelfde kleuren tegen mekaar (tenzij je wilt dat de kap een andere kleur heeft dan de zak). Zorg dat de lintjes van de kap nergens op een toekomstige naad liggen. Leg de schouderlinten ook op het draagzak paneel, met de naad ter hoogte van het begin van de vulling, zodat er ongeveer 11 cm uitsteekt. Zorg dat de uiteindes naar buiten komen ter hoogte van het binnenstuk dat je eerder naaide. Leg de tweede kleur draagzak hierop met de goede kant naar binnen en zorg dat alles mooi op mekaar past. Speld alles netjes tesamen: de naad van de kap, de naden van de schouderlinten (opgelet, het stukje hier tussen niet stikken, hier komt nog een schacht voor een treklint!), de zijnaden tot aan het binnenstuk, de korte zijnaad onder het binnenstuk en de onderste naad. Opmerking: ik bedacht achteraf dat het misschien handig zou zijn om een lusje te hebben om de zak mee op te hangen zoals een jas. Als je nog een restje treklint hebt kan je dat hier in het midden van de kap steken. Stik alle naden door en werk af tegen rafelen. Knip naden van de rondingen aan de zijkant onder de schouderlinten enkele keren in. Draai dan binnenste buiten langs de openingen in het binnenstuk. Stik de naden door op 0,5 cm van de rand langs de zijkant en onderkanten (behalve het binnenstuk). Stik dan de laatste stukken: 2 cm onder de kap voor de schacht van het treklint, een vierkant met kruis (mijn vierkant is 8 x 8 cm) ter versteviging van de schouderlinten en de drie schachten voor het heuplint en het treklint. Die laatste doe je op 2 – 10 – 10 cm afstand, ter hoogte van het binnenstuk. Stop je heuplint erdoor et voilà, je draagzak is klaar!

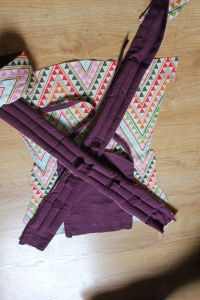
Leg de kap op de goede kant van de stof, zelfde kleuren tegen mekaar
Leg de schouderlinten op de draagzak. Laat 11 cm overlappen bovenaan ter versteviging aan de binnenkant
Leg de tweede kleur op het andere paneel, goede kant naar binnen
Zorg dat de schouderlinten naar buiten komen via de dubbele binnenstukken van het paneel
Draai de zak binnenste buiten langs de binnenstukken
Stik de schachten door op 2, 10 en 10 cm
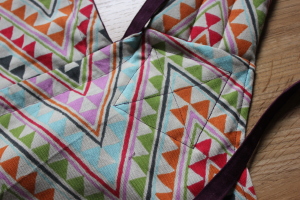
Stik de schouderlinten vast langs binnen, op 8 x 8 cm
Trek de treklinten door schacht met een veiligheidsspeld
onder het treklint zijn twee schachten voor het heuplint
Versteviging van de schouderlinten
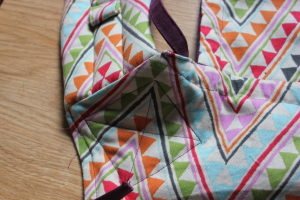
Schacht voor een treklint onder de kap
Bevestiging van de kap aan de draagzak
De schouderlinten
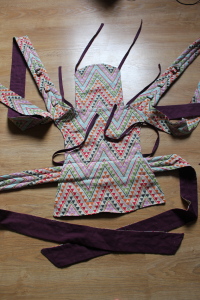
De draagzak is klaar!

Draagtips:

Hoe ga je nu aan de slag met je draagzak? Hier enkele algemene en specifieke tips:

– voor kleine baby’s stop je het heuplint in de bovenste schacht, als je oogappel wat groter wordt kan je de zak ook groter maken met de onderste schacht. Het horizontale treklint halverwege kan je gebruiken om de zak smaller te maken. Het is belangrijk dat je baby altijd een breed zitvlak heeft met de beentjes in ‘kikkerhouding’ en de knietjes boven de poep.

– Zorg dat je baby ongeveer op ‘kushoogte’ hangt: je moet met je mond aan zijn hoofdje kunnen. Dat is belangrijk voor jouw ergonomie. Het dragen mag niet oncomfortabel aanvoelen! Experimenteer eventueel met de juiste hoogte.

– Zorg dat de linten zo min mogelijk verfrommeld zijn en je ze zo breed mogelijk gebruikt. Je baby mag ook goed strak aangetrokken worden zodat hij goed in de zak zit en je het gewicht dicht bij jou draagt.

Hoe de baby in de draagzak steken (oefen eerst met een knuffel als je je onzeker voelt):

– Bind het heuplint rond en maak vast met een dubbele knoop. Trek het treklint aan om de zak eventueel smaller te maken en maak vast met een lusknoop aan beide kanten.
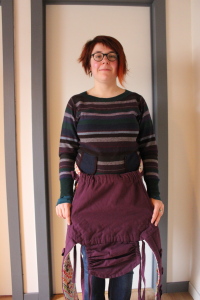
Doe het heuplint om en maak het treklint smal genoeg voor de beentjes van je baby (van knie tot knie)

– Neem je baby op en zet hem met beide beentjes aan weerskanten van de zak, tegen je buik. Houd de baby ten allen tijde vast met één hand!

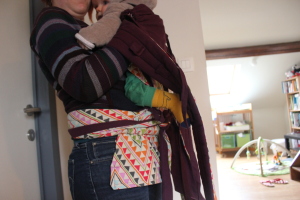
Zet de baby in de zak

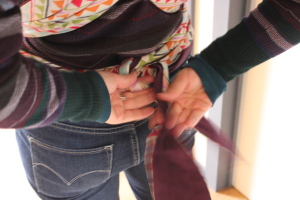
– Trek één schouderlint over je schouder en trek het kruiselings over je rug en onder het beentje van de baby. Wissel van hand en doe hetzelfde met het andere schouderlint. Trek goed aan. Nu kan je de linten een eerste keer goed vastknopen onder het zitvlak van je baby. Ofwel knoop je ze hier vast, ofwel kan je nog eens naar je rug doen en daar vastzetten met een dubbele knoop.

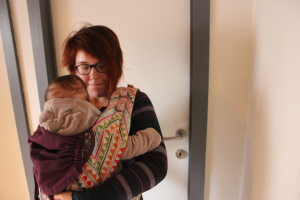
Trek het schouderlint over je schouder en kruiselings over je rug
Doe hetzelfde met het andere schouderlint
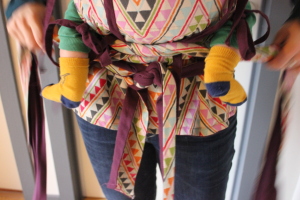
Laat de schouderlinten onder de beentjes uitkomen en knoop vooraan met een strakke knoop
Zet de schouderlinten vooraan of achteraan vast met een dubbele knoop

– Je kan de kap smaller maken met het horizontale treklint. Je kan ook een neksteun maken door de kap wat op te trekken over de twee treklinten en die vast te zetten aan de lussen op de schouderlinten. Voilà, je bent klaar om naar buiten te gaan!

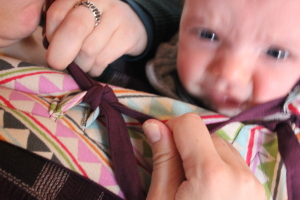
Maak de treklinten van de kap vast aan de lussen op de schouderlinten voor extra neksteun
Klaar om op stap te gaan!
Opgelet, draagzak is comfortabel. Baby might fall asleep :-)
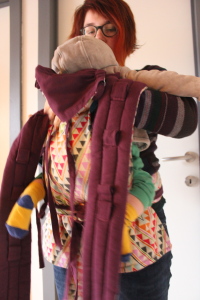
Ook papa’s staan prima met een draagzak!

Voor meer tips, rugdragen enz… verwijs ik graag naar een goede workshop door een gecertificeerde draagconsulent, in Brussel is dat bijvoorbeeld Myriam Drabs: hier en hier kan je checken wanneer er een sessie plaatsvindt. In Leuven heeft Doekjes en Broekjes ook workshops.

Veel plezier ermee!

Pear pie with cake filling

What is one to do with too much time on one’s hands and some very ripe pears plus a roll of shortcrust pastry that desperately needs to be used up in the fridge? That’s right, turn them into pear pie. The sliced pears (you could use apples or other fruit as well)  give this pie a refined look while really, it’s so easy to make.

Ingredients:

one roll of ready-made shortcrust pastry (quite easy to make yourself as well, if you have time! I have a recipe here, or use one of Martha Stewart’s)
185 gr soft butter
185 gr sugar
3 eggs (preferably at room temperature)
1 tsp vanilla extract
185 gr self-rising flour (or regular flour + baking powder)
4 ripe pears (I used Durondeau, but any kind will do)

1 pie plate (+/- 25 cm)

pear pie with cake filling

How to:

Take the shortcrust pastry out of the fridge, let it rest for a little bit, roll out or spread out and line the pie plate with the dough. If it’s home made, use butter and flour first to prevent sticking. Using a fork, poke some holes in the pastry.

Combine  butter and sugar in a large bowl. Use an electric whisk or stand mixer to beat them together until white and airy, don’t stop too soon. Add in the vanilla extract and eggs one by one and keep beating until combined.

Sieve the flour into the bowl and combine, don’t mix for too long this time, to prevent the dough from getting too ‘heavy’. Pour the dough into the prepared pie plate and distribute evenly with a spoon or spatula.

Preheat the oven to 175 degrees Celsius. Peel the pears, cut into four quarters, remove the core and slice lengthwise. Arrange the pear slices in a circle, pressing them into the cake dough. Start with one circle on the outside and then move on to the inside. I arranged the inner circle in the other direction for aesthetic reasons, though I doubt there’s a big difference in the end product. You may have to shift the outer circle a bit to fit in the inner one, depending on the size of the pie plate and the slices. When ready, pop into the oven for about 40 minutes, until a toothpick comes out clean of the cake center of the pie. The baking time may depend on your oven and on the juiciness of the pears. If it turns too dark, cover with some foil.

Let the pie cool on a rack, in its plate. Enjoy!


Vegetarian lasagna with lentil and zucchini

An often-heard complaint among vegetarians is that restaurants offer very little originality in their vegetarian fare, a meatless lasagna being among one of the more trite options. I don’t mind so much, as lasagna is usually quite enjoyable. I realize that there is already a vegetarian lasagna on this blog (over here) and for a more wintry version I will direct you to Jonge Sla’s scrumptious pumpkin lasagna (in Dutch), but this is a rather ‘quick and easy’ version, made with what happened to be available in my fridge, compared to the one where I have you skin bell peppers. It resembles meat lasagna quite well, thanks to the tomato and bechamel sauce. Suited for freezing as well!

veggie lasagna

Ingredients (makes 4-5 servings):

one big or two medium-sized onions, finely chopped
2-3 cloves of garlic, finely chopped1 zucchini, chopped in small pieces
5 tablespoons of small orange lentils (the kind you can put in soup as well)
white wine, for cooking
500 grams of diced tomatoes (canned or in brig)
olive oil
Provencal herbs mix, salt and pepper
45 grams of butter
45 grams of flour
0,8 liters of milk
nutmeg
block of Parmesan cheese and grate (or grated cheese)
8-10 lasagna sheets

How to:

Heat some olive oil in a large saucepan on medium fire. Add the onion and fry for a few minutes, until tender. Add the garlic, fry for another minute. Add the zucchini and season with Provencal herbs (don’t be frugal here), salt and pepper. Stir regularly. When the zucchini starts to get tender, add lentils and cover with a lid for a few minutes. Add a good swig of white wine, cover again for a few minutes (check regularly so it doesn’t burn). Add diced tomatoes, another swig of white wine and some herbs/salt/pepper, turn the fire down, cover with lid, and stir every now and then. The zucchini and lentils should slowly become completely tender. Meanwhile, preheat the oven to 200 degrees Celsius.

Veggie lasagna

In another saucepan, make the bechamel sauce: melt the butter on medium fire and add the flour. Stir together with a wooden spoon and let it ‘bake’ for a few minutes, until it starts to smell a bit like cookies. Be careful that it doesn’t burn, this will ruin the taste of your sauce (better start again if this happens). Add milk and use a whisk to stir vigorously, until the butter-flour mixture is completely dissolved. Let it heat on medium fire, whisking regularly, until the sauce starts to thicken and bubble. Season with nutmeg and salt, then turn off the fire. Make sure you keep whisking for a while so it doesn’t burn.

Scoop 1/4 of the tomato sauce into a baking dish (mine is 25 x 25 cm), ladle over 1/4 of the bechamel sauce. Sprinkle with a thin layer of Parmesan. Cover with lasagne sheets and repeat 3 more times. Add a thick layer of Parmesan and bake in the oven for 20-25 minutes, until golden brown. Let the dish rest for 10 minutes, then enjoy!

IMG_6598

Veggie lasagna  Veggie Lasagna

Veggie lasagna

Brussels endive, cashews and feta pie

Brussels endives are up there in the Hall of Fame of my favorite vegetables – right between eggplant and cherry tomatoes. I am a sucker for braised endives – the whole vegetable, sliced lengthwise and braised slowly – patiently! – in a heavy bottomed skillet with a little butter and a tiny bit of moisture, until tender and ready to melt on your tongue… hmmm. Unfortunately, not everyone (including my significant other) is an equally big fan of braised endives. It is in fact very much an acquired taste, due to the endives bitterness. This recipe is an attempt to spruce things up with some extra ingredients and introduce the endives into a more quiche-y concept. (also, I had some ready-made pie dough that was past expiry date and needed quick baking – oops). I meant to use pine nuts but found mine had in fact become rancid (double oops) and so I used cashews instead. I also used soy cream instead of regular cream to keep it a bit healthier, since there’s already butter and cheese in the dish. The result was delicious and I hope you’ll give it a try!

braise, baby, braise!

Ingredients (about 3-4 servings):

one portion of store-bought or home made pie crust (I used shortcrust pastry, but puff pastry would work as well)
a handful of cashew nuts
50 grams salted or unsalted butter
one red onion, finely chopped
2 garlic cloves, finely chopped
about 20 grams of fine sugar
4 stumps of Brussels endives, cut in half lengthwise
100 grams of feta cheese
250 ml of soy Cuisine cream (or regular cream)
2 eggs
salt and pepper to taste

How to:
Preheat the oven to 175 degrees Celsius. Roll out the pie crust in a regular-sized quiche pan (preferably a metal or porcelain one) and poke holes in the dough with a fork. Put a large heavy bottomed skillet on a medium fire (no grease!) and when hot, roast the cashews until golden brown. Pay close attention as this can advance quite quickly and the nuts will go black. Put the cashews aside, let them cool down and crumble them into bits. Heat a bit of butter in the skillet and add the chopped onion. Fry the onion in the butter and add the garlic after a few minutes. When the onion starts to become brownish, remove from the skillet and add to the cashews. Add some salt and pepper.

Put the rest of the butter in the skillet and let it melt. Sprinkle with sugar (I usually don’t use sugar on endives, but it helps to caramelize them in this case. If you dislike the bitterness you can always add more but I think it’s a shame to drown the delicate endive taste in sugar). Let it sit for half a minute, then carefully put the endives in the pan, flat side down.

Now comes the delicate part that will test your patience. Don’t turn up the fire too high, as the endives will burn and be ruined. Cover the skillet with a lid. Turn the endives around every few minutes. The inside of the skillet should contain enough moisture, if not, add a little bit of water. Let the endives braise for 15-20 minutes, until completely tender and slightly caramelized on both sides. Turn off the fire and try to restrain from eating them like this…

IMG_6458

Compose the endive in the quiche pan. Sprinkle with the cashews and onions and crumble the feta over them. Beat the eggs with the soy cream, add pepper and salt and pour over the endives. Bake in the oven for 30 minutes until golden brown. Let it cool a little.  Enjoy!

cashews and feta

Brussels endive pie with cashews and feta


Martha Stewart’s Asian Meatballs

Happy New Year everyone! May your 2015 be filled with love, luck and good food.

I’ve hardly made any resolutions this year, although cooking good food is always among them. Working in the house is still on the list, which explains my absence here for the past half year… Sorry about that, though I’m not making any promises I can’t keep until the house is done :-)

And don’t worry about the title of this post – I’m still a vegetarian, no changes on that front (in fact, I started replacing a lot of my dairy with soy products in 2014 and I plan on keeping it that way). I just made these meatballs for our New Year’s Eve party and they are always such a hit that I figured I had to share them. If you consider me a hypocrite now, you’re just giving me a good occasion to put my resolution not to care too much about others’ judgments into practice… On a more serious note: to all vegetarians out there (and to all those meat-eaters who feel the need to judge vegetarians): there is no Bible laying out the rules for being a ‘good’ vegetarian. So if you feel like having meat every once in a while, whether you like or don’t like eggs, dairy, or you can’t go without blue cheese, don’t let anyone tell you what’s right and what’s not. I had one of these yummy meatballs on the very edge of 2014 and I expect I won’t be eating any more meat until at least halfway 2015 (oh barbecue season, still can’t resist those merguez). Any diminishing of meat and animal products on your plate is a contribution toward a better environment… Anyway, time for the recipe!

This recipe is from Martha Stewart’s hors d’oeuvres bible (if you can lay your hands on it, don’t hesitate to buy!). I’ve adjusted it a bit more in keeping with Belgian meatball tradition and added eggs and bread-crumbs.

For a big platter of meatballs that will satsify at least 10 people (as a hors d’oeuvre):

about 750-800 grams of mixed ground meat (pork – veal – beef, all fine)
a bunch of fresh coriander, leaves finely chopped
one egg
one medium size or two small shallots, finely chopped
3 cm of ginger, finely chopped or grated
2 teaspoons of regular soy sauce
bread-crumbs (paneermeel)
salt and pepper
for the sauce:

two cloves of garlic, finely chopped
3 cm of ginger, finely chopped or grated
1 heaping teaspoon of corn starch (maïzena, the yellow package)
200 ml of chicken stock (I just add one cube of chicken stock to water and mix it in the sauce afterwards – laziness prevails)
2 teaspoons of regular soy sauce
2 teaspoons of dark brown sugar
a hint of chili paste (harissa, for example, but anything spicy will do)

How to:

Mix all the ingredients for the meatballs in a big bowl with a fork. Add salt and pepper to taste, and bread-crumbs until the meat is not too greasy and can be rolled into balls easily. I usually add at least 2-3 tablespoons, but this can really depend on your ground meat mix. Roll into 2-3 cm bite-size meatballs.

Put a large heavy pan on a medium fire. Add a little bit of oil for the first batch (afther that, there’s enough grease). Bake the meatballs until they’re completely baked in the middle – 15 to 25 minutes, depending on the size of the meatballs. Shake the pan every few minutes to let them brown evenly. Meanwhile, mix the corn starch with two teaspoons of water in a glass.

Once the meatballs are done, leave the pan on the fire and add the chopped garlic and ginger. Let them bake for about a minute, don’t let them become too black though. Add the chicken stock (this is where you’ll be making sure the stock cube gets dissolved) and stir loose the baked bits on the pan. Stir in the soy sauce, brown sugar and chili. Let the sauce heat up and when it’s boiling, add the corn starch and let it thicken for a minute. Then spread the sauce over the meatballs. Serve with toothpicks and enjoy!


Spinach and rice pie

We used to eat this spinach and rice pie every now and then at home, I’ve always loved this recipe. I recently tried it in my own kitchen for the first time and – without tooting my own horn too much – it turned out quite splendidly! I believe one of the secrets to get such a beautifully baked pie is using a metal pie form instead of a porcelain one. Oh, did I mention that this is quite a healthy recipe? Give it a try!

Ingredients for 6-8 servings (depends on how hungry you are, and if you’re serving anything else like salad with the pie)

1 big onion, chopped finely
1 kg of fresh or frozen spinach, roughly chopped
2 or 3 chopped garlic cloves, to taste
butter and olive oil
hot vegetable stock
150 grams of (basmati) rice
4 eggs
150 grams of parmezan cheese, grated (or other tasty hard cheese)
breadcrumbs
grated nutmeg, pepper and salt to taste
a metal pie form, about 26-28 cm diameter

Spinach and rice pie

How to:

Put a large casserole on medium heat and add a drizzle of olive oil or butter. Fruit the onion until it’s soft and starting to become brown. Add the garlic and fry a little while with the onion. Add the spinach, you can do this in smaller bits at a time, as fresh spinach can be quite large. Stir-fry with the onion and garlic and add grated nutmeg, peper and salt. When the spinach has shrunk completely (or the frozen spinach has thawed), add the rice and keep on stir-frying a bit. Now add the vegetable stock in small portions. Be careful with quantities: my spinach released quite a lot of water, so I ended up having to scoop out liquid becaue I added too much vegetable stock at once. You want the rice to cook but not completely, there needs to be enough liquid left to cook the rice but too much will get you a soggy pie. When the rice is halfway done, take the casserole off the fire and let it cool a little. Preheat the oven to 180 degrees Celsius. Then add eggs and parmesan, and more nutmeg, pepper and salt to taste. The mixture should be quite gooey and contain plenty of liquid.

Butter the bottom and sides of your pie form and add breadcrumbs, whirl them around so every part of the form is covered in breadcrumbs and add the spinach mixture. Divide the spinach evenly and smooth over with a spoon. Cover with another layer of breadcrumbs (just scatter them from the box or with a spoon over the spinach until completely covered, it’s okay if the breadcrumbs soak up some of the liquid). Bake the pie for +/- one hour in a 180 degrees oven, if it becomes too brown you can cover with a layer of tinfoil. Enjoy!

Spinach and rice pie

Beetroot, apple and feta salad

I’ve never been a huge fan of beetroot. It has a certain ‘earthy’ taste that I rather dislike. However, I recently had the honor of trying out a beetroot-bulgur salad for a new cookbook by Jonge Sla and got stuck with leftover beetroot (the good news: it  stays good for a very long time in the fridge!). My husband is not a big beetroot fan either so on a night alone I remembered a very nice beetroot and apple salad we had at our wedding buffet I looked up some recipes and ended up making a twist on Jeroen Meus’ beetroot salad.  I particularly like cooking the beetroot in red wine and spices, this neutralizes the ‘earthy’ taste. My star anise has decided to disappear from the kitchen, so I used cloves instead, this worked very well (not a big anise fan either here, to be honest. I’m starting to sound like a picky eater but I swear I’m not!). I love the combination of the beetroot, apple and feta – I might be turning into a beetroot convert!

Ingrediënts for 4 servings (as a side dish):
+/- 500 grams beetroot
half a bottle red wine
2 tablespoons red vinegar
1 teaspoon pink pepper, crushed
2 cloves
1 sweet apple (I used Pink Lady)
150 grams feta cheese

Vinaigrette:
1 teaspoon mustard
1 teaspoon honey
4 teaspoons raspberry vinegar
4 cardamom pods
3 tablespoons good olive oil

How to: Firstly, make sure you wear an apron and use gloves if you don’t want to get red hands: the beetroot gives off a lot of color! Protect ‘stainable’ areas in your kitchen (and the vicinity of your kitchen, if you’re anything like me) Peel the beetroot and cut into large chunks. Put those into a small casserole and add red wine and vinegar. If the beetroot is not entirely covered, add a little bit of water. Add in the pink pepper and cloves, put the casserole on the fire and bring to a boil, let simmer gently for at least 45 minutes, until the beetroot is completely tender.

Meanwhile, make the vinaigrette. Mix the mustard, honey and raspberry vinegar in a small bowl. Take the cardamom seeds out of the pods, crush them in a mortar or with the side of a large knife. Add them to the mixture. Beat with a fork or a whisk while pouring in the olive oil, so that it emulsifies.

When the beetroot is tender, take them out of the wine and let them drip and cool down. Cut the beetroot into small dice. Dice the apple and mix with the beetroot in a large bowl. Add the vinaigrette – not all of it at once, stop if you’ve got too much. Toss with the beetroot and apple. Crumble the feta and spoon through the salad. Enjoy!

Guest Post: Victoria Sponge Wedding Cake

Guest post: Victoria Sponge Wedding Cake

I have a little secret to tell you: my little sister and I share a love for baking. In fact, she’s probably a better patissier than I am. I’ve been trying to convince her to share her Mississippi Mud Pie or lemon squares as a guest post but it just hasn’t happened so far (don’t worry, I haven’t given up yet!). But when I got married three months ago, she baked my wedding cake and it was just too awesome not to share. So here it is: the story of my Victoria sponge wedding cake by my sister Eline.

Eline cake

When my sister told me she was getting married last year, I laughingly suggested that I could make her wedding cake as a contribution to all of the wedding planning madness. Little did I know what kind of project I was taking upon myself…

Now, I am quite an experienced amateur baker and have made my fair share of baked goods – mostly cookies, cakes and pies, but I’d never even attempted any sort of multi-layer cake, so this was quite a big project. After months of sending each other pictures of wedding cakes and Aude Pinteresting every monstrosity of a cake she could find, we still hadn’t settled on what it should be. 3, 4 or 5 layers? Chocolate cake, vanilla cake, fruit cake, biscuit (a firm favorite of our mom’s, it can be compared to a very light, fluffy angel food cake), or some other type? We pored over blogs and cookbooks endlessly and in my kitchen in Dublin I tried a few recipes. Luckily I still had a whole summer to figure out what this cake would end up looking like, so I wasn’t too worried yet.

As I don’t have any experience with fondant, I thought covering  a 4-layer cake with it would be too much of a challenge, so we settled on buttercream frosting and fresh flowers or fruit to decorate. However, after several tasting sessions with different types of cake and frosting including one crumbly frosting disaster, I was covered in frosting from head to toe and ready to throw in the towel. We all came to the conclusion that we’re simply not much of a buttercream family, and buttercream was ruled out. So on I went, experimenting with vanilla powder, gelatin and whipped cream to come up with a more stable frosting. Even though everyone was enjoying the endless stream of test cakes, it seemed about time to settle on something definite.

Then, one Sunday afternoon in August, I wanted to make a very basic cake and, as my mom and I have fallen in love with Victoria sponge cake ever since we’ve started taking trips to the UK, I settled on a Victoria sponge cake, the quintessential British icon, and looked up a good recipe. I came across a few pictures of stacked, gorgeous-looking sponge cakes and started googling some more. According to some wedding blogs, sponge cakes were all the rage; apparently they were the wedding cake vintage hype of the year (thank you once again, Pinterest). As Aude didn’t mind the cake looking rustic and homemade, and I was much more comfortable with this than with  some frosted monster, we’d finally figured it out!

As you might imagine, the following weekends were spent trying out different sponge cake recipes and frostings, and finally, on September 6th, I produced the largest cake I’ll probably ever make (never say never though, I guess). Without further ado: here’s the recipe for the ultimate Victoria sponge cake!

Victoria Sponge Wedding Cake

Victoria Sponge Wedding Cake

Proportions are for a normal afternoon tea (21cm cake), not a wedding. Further down, I give you some basic tips on how to multiply the quantities and stack the cakes – but do test this beforehand.

Ingredients:

  • 3 large eggs

  • weight of the 3 eggs in self-rising flour, unsalted butter and fine sugar

  • 1,5 tablespoon baking powder

  • 1 teaspoon salt

  • 3 tablespoons milk

Filling

  • crème de framboise liquor or another fruity liquor (optional)

  • raspberry jam

  • Frozen fruit (mix of berries or raspberries), defrosted and mixed with few spoonfuls of sugar OR fresh fruit if available

  • 250 grams mascarpone

  • 250 ml whipped cream

  • bag of vanilla sugar or vanilla extract

  • 1 tablespoon sugar

  • powdered sugar for decoration

  • fresh fruit for decoration (optional)

Preheat the oven to 180C. Grease a 21 cm spring-form and put in a circle as large as the bottom of your tin, cut out from baking paper. Put the butter and sugar into a food mixer, or use a hand mixer to combine until light and really fluffy, this can take a few minutes. Add the eggs to the mixture one at a time while beating very well until everything is properly mixed, again this can take a while. Scrape down the sides of your bowl to make sure all ingredients are mixed properly.

Add the flour, baking powder and salt and mix this in properly. Then add the milk, making sure the dough is still firm but will easily drop off your mixer when you shake it. Don’t over-handle the dough, as this will make the cake less fluffy. Put the dough into the pan, smooth the top and bake for 25-30 minutes or until the cake is golden, has risen and a toothpick comes out clean. Then let the cake cool for a while in the tin, open it and let it cool further on a grid.

If you want a perfect-looking cake (or you need it to be flat for stacking several layers), cut off the top when it’s completely cooled to make it perfectly flat. If a homemade look suits you better, leave it on. Then cut your cake through the middle, take the bottom half and sprinkle the top with the crème de framboise so it’s well soaked. Spread a thick layer of raspberry jam on top.

Mix the mascarpone cream and whipped cream with a tablespoon of sugar and a bag of vanilla sugar or a few drops of vanilla extract. Beat with an electric mixer until it becomes very stiff and looks like thick whipped cream. Then take the defrosted frozen fruit or fresh fruit and spread a thick layer on top of the bottom cake. Top this with the mascarpone mixture until the whole of your cake layer is covered, then lay the top half of your cake on top. Dust with powdered sugar and decorate with fresh fruit if you like. Enjoy (as the British do, during some fine afternoon tea)!

(read on for the wedding cake instructions)

the cutting of the cake


If a simple Victoria sponge just doesn’t satisfy your inside megalomaniac and you’re ready to take on the challenge of making a 4-tiered (wedding) cake, here’s how I made mine, good for about 80 small portions:

The cake as seen in the picture consists of 4 layers, so you need 4 different spring forms: 30 cm, 26 cm, 21 cm and 16 cm.

Basically, you can recalculate the ingredients for the cake on the basis of the number of eggs, since you use the eggs to weight the other ingredients. Take 0,5 tablespoon baking powder per egg, one tablespoon of milk per egg and add a slight pinch of salt (don’t exaggerate with the salt). Use 2 eggs for a 16cm cake, 4 eggs for a 26 cm cake and 5 or 6 eggs for the 30 cm bottom cake. The filling isn’t as easy to multiply accurately, but if you’re going to make a large stacked cake you’ll need at least 1kg of mascarpone and 1 liter of cream, and you can easily make more from there.

When it comes to stacking, you essentially need two things: something that acts as a dowel to put inside the cake, and those golden cardboard pie plates to put underneath every layer (you can buy these at paper specialty stores, craft stores, large food or patisserie supply stores or ask you baker). Because I couldn’t find any real dowels, I used those plastic firm sticks they use to attach balloons to (can be found at party/craft stores). Some bloggers suggest plastic straws, but I’m not quite sure if these are strong enough – remember, the bottom cake carries the weight of all the others combined .

Cut the golden cardboard into circles the exact size of your cakes (if they’re too small they might not be supportive, but if they’re too large they will be visible). The dowels go into the ‘supporting’ cake at strategic points and are used to ensure the cake doesn’t cave under the weight. Put your bottom cake on a cardboard and then on a sturdy plate or pie stand. Always spread a little frosting on your cardboard circle before you put the cake on, this will make it less prone to sliding and moving around. Put the smaller cardboard circle on top of the supporting cake and put toothpicks right near the rim at four points so that they form a square. Remove the circle and carefully insert the dowel into the cake at about 1 cm inwards from the toothpick. Mark the top of the dowel with a food-safe pen and take the dowel out. Cut right under this mark and put the dowels back into the cake. Stack and fill the next layer on top, then repeat until you’re at the top layer (which doesn’t need to be done). Decorate the cake to your liking, I used more cream mixture and fresh berries (and of course the gazebo with the plastic wedding couple!).

 Jam layer

First layer


The stacking process


The fruit layer


IMG_0652


Divine pecan pie

Pecans are by far my favorite nuts, unfortunately the American classic of pecan pie hasn’t really made it big across the Atlantic. Time to change that! This is a slightly modified version of Martha Stewart’s pecan pie recipe, with a pastry crust from Jeroen Meus. I didn’t weigh out all the ingredients, so use this rule: 1 cup = 250 ml.

Ingredients:

for the crust:

250 gr baking flour
125 gr cold butter, in small cubes
90 gr icing sugar
30 gr ground almonds
1 egg
a pinch of salt

for the filling:

4 large eggs at room temperature
250 ml maple syrup or golden syrup (or 200 ml maple syrup + 50  ml Belgian kandijsiroop)
85 ml brown sugar and 60 ml white sugar
60 gr butter, melted
3 cups pecan nuts
2 tablespoons of brown rum
pinch of salt
1 teaspoon of vanilla extract

Divine pecan pie

How to

Start with the crust, as it needs cooling. Sieve the flour and icing sugar into a large bowl, add the ground almonds and salt. Add the butter and rub with between your fingers or use a pastry cutter, until all is mixed and you have a collection of crumbs. Add the egg, knead into a homogeneous mass (avoid handling the dough for too long) and shape into a ball. Wrap in plastic foil and let the ball cool in the fridge for at laeast 30 minutes.

Preheat the oven to 190 degrees Celsius. Before use, roll out the dough onto a flour-dusted surface until it’s large enough to fit a rimmed pie plate, mine was about 25 cm. Test by holding the pie plate over the rolled-out dough, it needs to be larger to fit the sides. Butter the pie plate and transfer the dough. Don’t worry if it breaks up a little, you can ‘paste’ it back together once it’s in the plate. Set this in the fridge until the filling is done (to my surprise, Martha Stewart didn’t recommend blind baking first, so I didn’t do this and it turned out fine).

Make sure your eggs are at room temperature, not straight from the fridge or they might clash with the melted butter. In a large bowl, whisk the eggs, syrup, sugar, butter, vanilla, rum and salt together. Mix in the pecan nuts. Pour the filling into the cold pie crust and pop into the oven. Bake for 50-60 minutes until the filling is solid, it can still be a little jiggly in the middle. Keep an eye on the pie in the oven: my pecans started to turn quite dark after a while so I turned down the heat to 170 and covered the pie with aluminum foil to prevent it from burning.

Let the pie cool in its plate. Enjoy!


cheesecake-marbled brownies

One of my favorite coffee bars in Brussels is Coffee Company in the Zuidstraat. There’s a large choice of coffees, cold coffees and other drinks and the interior is filled with bazaar style sofas and bric-a-brac tables and seats. Besides offering some good salads, sandwiches and wraps for lunch, they always have a counter filled with sweet goodies like apple pies, homemade cake, brownies… In short: whenever I’m in the area (which happens now and then, since there are lots of nice clothing shops there) I have a hard time resisting a macchiato with a bakery treat. So one day I popped in and decided to try something I would describe as ‘cheesecake -meets-brownie’: cheesecake on top and brownie on the bottom. Oh my, this thing honestly came close to baked goods-perfection!Brownie batter

So when I was considering what to whip up for my birthday treat at work (yes, I managed to make it to a quarter century the past weekend, thankyouverymuch) while scouring Smitten Kitchen’s recipe page for something to use up the excess of chocolate chips that occupy my shelves since the last baking party, I found a cheesecake-brownie recipe that looked a lot like what I had at the Coffee Company. Time to give it a try!

marbled batter

My square ‘brownie-baking pan’ – actually, this glass pan is probably the most multifunctional thing in my kitchen, it serves for anything that needs to be baked in the oven – is larger than the one in the recipe (8 inches or 20 cm, while mine is 25). So I multiplied the quantities by 1.5, and also changed the sugar ratios since I don’t have unsweetened chocolate (I don’t think it’s sold in Belgium, since well, Belgians only buy tasty chocolate). The original recipe can be found here. Here’s mine!

(Note afterward: It turned out quite well, but I might have to try with a larger proportion of cheesecake in the future. Let me know if you have your own favorite recipe!)

marbled and sprinkled with chocolate chips

Ingredients

170 grams butter
120 grams dark chocolate (chips)
1 cup sugar
3 large eggs
1 tsp vanilla extract
1 cup all-purpose flour

400 grams cream cheese (Philadelphia or the likes)
1/2 cup sugar
2 egg yolks
1/2 tsp vanilla extract

dark chocolate chips to ‘scatter’ over the batter

How to:

Preheat the oven 175 degrees Celsius and butter a square 25 cm baking pan. Melt chocolate and butter together on low heat. Remove from heat and whisk in sugar, eggs, vanilla, and a pinch of salt until well combined. Sieve and whisk in flour until just combined and spread in baking pan. So much for the brownies!

Mix the cream cheese, sugar, egg yolks and vanilla until fluid for the cream cheese part. Pour over the brownie batter. Now, take a small spoon/spatula/knife with round tip and ‘scoop’ into the brownie batter, swirling it around so it turns into a marbled pattern (see picture above).

Sprinkle with chocolate chips and pop into the oven for 30-40 minutes, until the sides start to puff up. Brownies are traditionally still a bit unbaked and moist on the inside, and as I’m still getting to know my new oven, I found it quite hard to figure out how much time it needed. The sides became ‘cracked’ and it was quite inevitable to bake the sides more than the middle in my case. If you’re not sure, cut out a small piece and give it a try, and remember that it will become less moist once it’s cooled. Enjoy!

The finished brownies